

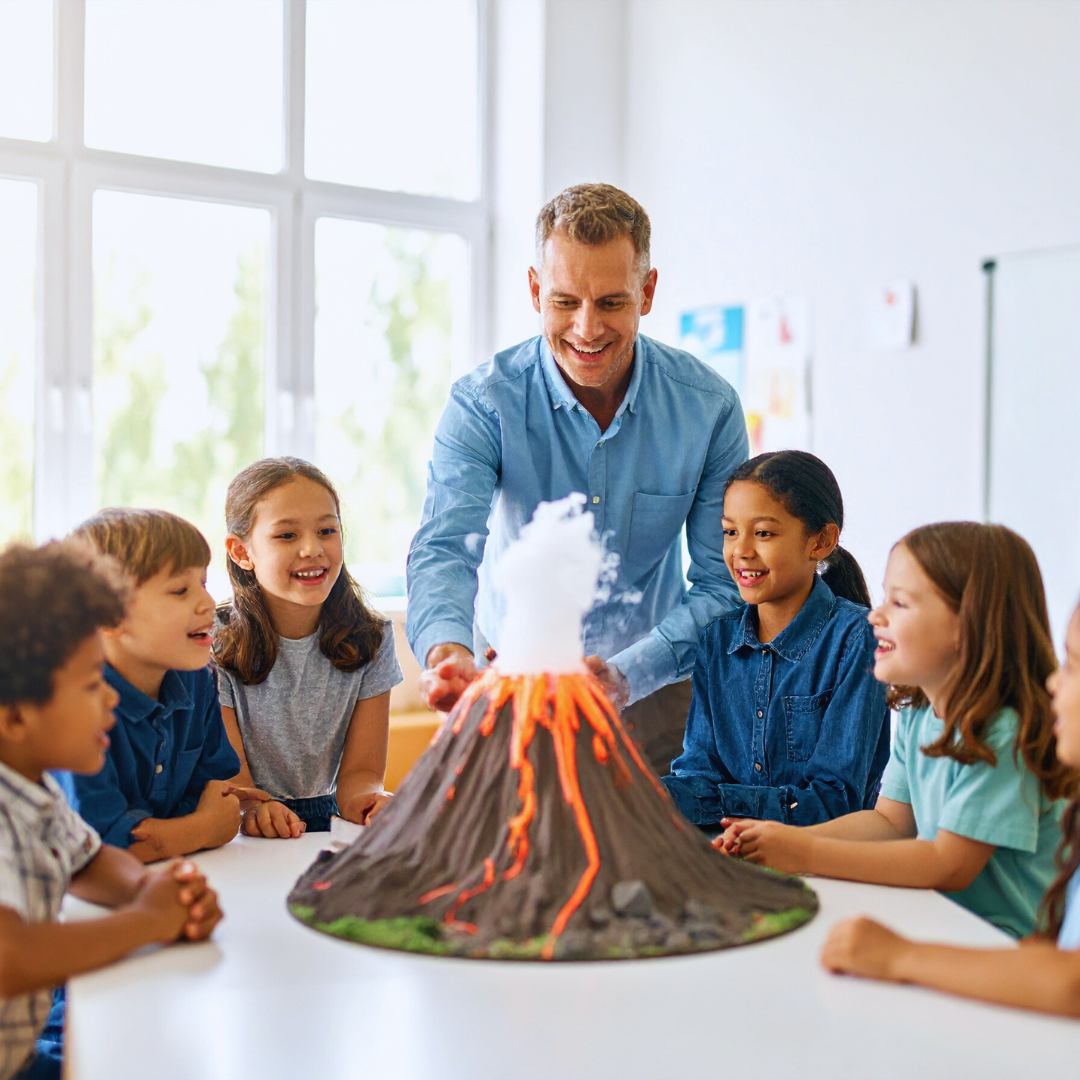

Creating a volcano using kitchen ingredients is a simple science experiment that anyone can do at home. The process involves combining baking soda and vinegar to create a chemical reaction that mimics a volcanic eruption.
This experiment requires only common household items, making it accessible and educational for all ages. It provides a clear example of an acid-base reaction in a fun, visual way.
By following a few straightforward steps, it is possible to build a volcano model that erupts realistically. This hands-on activity helps explain natural phenomena while encouraging curiosity about science.
Essential Materials and Ingredients
Building a kitchen volcano depends on a few carefully chosen ingredients that react predictably. These create the foaming eruption that mimics lava flow, while also allowing adjustments for visual effect and reaction strength.
Baking Soda and Vinegar Selection
Baking soda, scientifically known as sodium bicarbonate, is the base of the eruption reaction. It must be fresh and free from clumps to ensure even mixing. Standard kitchen-grade baking soda works best.
Vinegar contains acetic acid, which reacts with the baking soda to produce carbon dioxide gas. White distilled vinegar is preferred due to its consistent acidity (usually around 5%), providing reliable reactions. Avoid malt or balsamic vinegar as their composition can reduce the effectiveness.
Using approximately one tablespoon of baking soda and half a cup of vinegar typically produces a strong eruption. Adjusting these amounts affects the duration and size of the foam.
Using Dish Soap and Food Colouring
Dish soap is added to the volcanic mixture to trap gas bubbles, increasing foam volume and simulating flowing lava. A small amount, about one teaspoon, is sufficient to create thick, stable bubbles.
Food colouring enhances the visual effect. Red or orange shades mimic the natural lava’s colour, but other hues can highlight the experiment’s playful aspect. Use liquid food colouring for easy mixing. Gel colours may not dissolve as evenly.
Adding dye directly to the vinegar before mixing helps distribute colour throughout the eruption. The intensity of colour can be varied by the number of drops added, with 5-10 drops being typical.
Alternative Kitchen Ingredients
Several kitchen items can replace or supplement the traditional ingredients for variation. Lemon juice works as a mild acid alternative to vinegar, though the eruption is generally less vigorous because it contains citric acid.
Cream of tartar (potassium bitartrate) can be mixed with baking soda to create a dry acid-base mixture. When water is added, it triggers the reaction, allowing for pre-prepared mixes.
For a thicker lava effect, cornflour or flour mixed with water can be integrated. This adds viscosity but reduces the eruption’s height. Honey or syrup can also be added to modify the flow texture, but not the chemical reaction itself.
Building the Volcano Model
The construction of a homemade volcano requires careful assembly of the structure, attention to its appearance, and consideration of safety during setup. Each step is essential to ensure the volcano model functions correctly and looks realistic.
Creating the Volcano Structure
The base of the volcano model should be sturdy and stable. Common materials include a plastic bottle or a small container placed on a tray to catch spills. Around this, use papier-mâché or modelling clay to form the mountain shape, leaving space at the top for the eruption.
The layers should be built thick enough to hold shape but allow for the eruption hole. The opening at the top must be wide enough to add reaction materials easily. It is important to let any adhesives dry fully before proceeding to maintain the integrity of the structure.
Designing and Decorating the Exterior
Once the structure is complete and dry, paint it with brown, red, and black shades to imitate volcanic rock and lava flows. Adding texture with sand or small stones glued onto the surface enhances realism.
Additional elements like miniature trees or grass can be placed around the base for context. The decoration should be waterproof or sealed, especially if the volcano project will be used multiple times or outdoors.
Safety Precautions and Setup
Set the volcano model on a surface that is easy to clean, such as a tray or plastic sheet. Ensure children or participants wear protective gear like goggles and gloves when handling the eruption ingredients.
Keep all ingredients away from food preparation areas and supervise the process to prevent ingestion or spills on skin. The eruption should be performed in a well-ventilated space, with sufficient room for safe movement around the volcano project.
The Volcano Eruption Process
The eruption is driven by a chemical reaction between common kitchen ingredients, producing bubbles that push liquid out like molten lava. To create a convincing volcano eruption, precise preparation and controlled steps are essential. Adjusting the mixture and timing enhances the visual effect and imitates natural lava flow.
Preparing the Eruption Mixture
The eruption mixture consists primarily of baking soda and vinegar, which react to produce carbon dioxide gas. To prepare it, combine about 2 tablespoons of baking soda inside the volcano structure. Use white vinegar, roughly 100 millilitres, for the reaction. Adding a few drops of dish soap improves lava flow by trapping bubbles, making the eruption frothier.
Food colouring, such as red or orange, gives the appearance of real lava. Stir the vinegar gently with the colouring before pouring it into the volcano. This mixture should be used immediately after preparation to maintain the reaction’s intensity.
Steps for an Erupting Volcano
The eruption begins when vinegar is poured over the baking soda inside the volcano. The acid-base reaction releases carbon dioxide gas, which creates pressure and forces the foamy liquid out of the volcano’s mouth. This mimics the explosive nature of a real volcanic eruption.
To ensure consistent eruptions, pour the vinegar slowly or in stages. This method prolongs the reaction and can simulate multiple bursts. It is important that the mixture is fresh, as older vinegar or baking soda reduces eruption vigour.
Achieving a Realistic Lava Flow
To simulate lava flow, it is critical to control the viscosity and colour of the mixture. Adding dish soap thickens the eruption, allowing foam to flow smoothly down the volcano’s sides rather than splashing wildly. The foamy lava looks more authentic and lasts longer.
Using red and orange food colouring in combination creates a gradient typical of natural lava. Pouring vinegar gently encourages a steady flow rather than an explosive burst. Positioning the volcano on a slight incline helps direct the lava down slopes, enhancing realism in its movement.
The Science Behind the Reaction
When a kitchen volcano erupts, it’s the result of a well-understood chemical process involving simple ingredients. The interaction produces gas, heat changes, and visible bubbling that demonstrate fundamental scientific principles clearly.
Understanding the Chemical Reaction
The kitchen volcano relies on an acid-base reaction. Baking soda (sodium bicarbonate) acts as a base, while vinegar (acetic acid) is the acid. When combined, they react to form carbonic acid, which quickly decomposes into carbon dioxide gas and water.
This can be summarised in the equation:
NaHCO₃ + CH₃COOH → CO₂ + H₂O + CH₃COONa
The carbon dioxide gas causes bubbling and fizzing, which simulates a volcanic eruption. This reaction is instantaneous and visible, making it ideal for teaching basic chemistry.
Role of Carbon Dioxide Gas
Carbon dioxide (CO₂) is the key agent that drives the eruption in the kitchen volcano. As the acid and base react, CO₂ gas rapidly forms and escapes, creating foam and bubbles.
This gas buildup pushes the liquid mixture outwards, mimicking lava flow. CO₂ is colourless and odourless, but its volume changes can be easily observed during the experiment.
The production of carbon dioxide also shows how gases behave under pressure and can be applied in various science experiments related to gas expansion and release.
Acid-Base and Endothermic Reactions
The reaction between baking soda and vinegar is a classic example of an acid-base reaction. It is endothermic, meaning it absorbs some heat from the surroundings as it occurs.
This slight cooling effect can be felt if the container is touched during the reaction. Knowing this helps students distinguish between reactions that release heat (exothermic) and those that take in heat (endothermic).
The experiment gives practical insight into how chemical energy changes form during reactions, particularly in everyday substances suitable for science experiments for kids.
Educational Science Experiment Insights
This experiment combines simplicity with clear scientific principles that are easy to observe. It provides a hands-on way for children to understand concepts like gas production, chemical reactions, and energy changes.
Teachers and parents can use it to highlight the importance of chemical equations, reaction rates, and the different types of reactions encountered in chemistry.
By observing the reaction and outcomes, learners develop critical thinking skills and an interest in scientific inquiry using non-toxic, readily available materials.


