

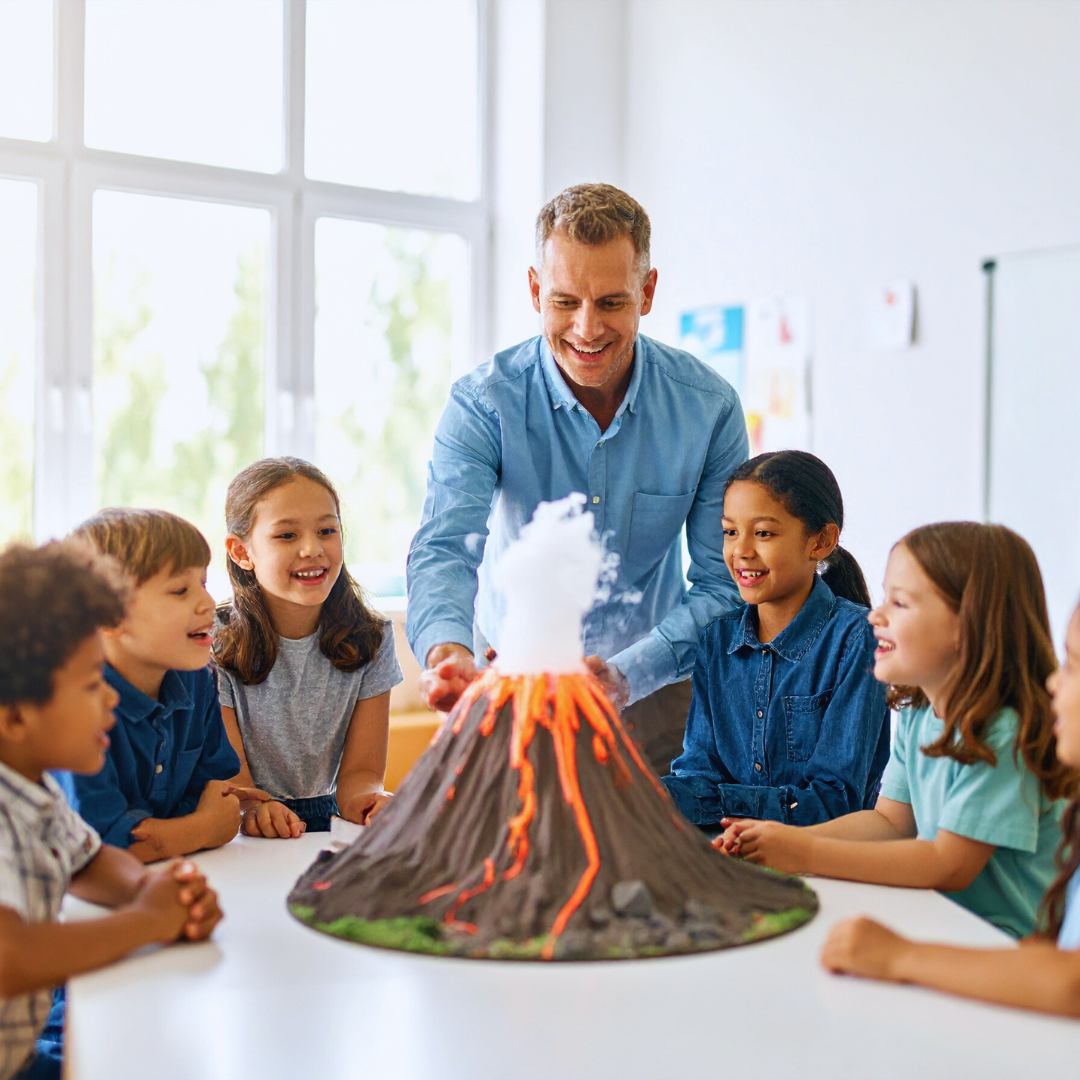


Creating a volcano experiment at home can be an exciting and educational activity for both children and adults. This hands-on project helps individuals learn about chemical reactions while having fun. With common household items, anyone can recreate the explosive effects of a volcano, making science accessible and engaging.
Gathering materials such as baking soda, vinegar, and food colouring is straightforward, ensuring that the experiment remains simple yet effective. Safety is manageable, and the visual effects will leave a lasting impression. This experiment not only captivates attention but also encourages curiosity about geology and Earth’s processes.
By following a few easy steps and using readily available items, it’s possible to bring the concept of a volcano to life right in the kitchen. Engaging in this activity stimulates learning and wonder, creating an unforgettable experience for everyone involved.
Understanding Volcanoes and Eruptions
Volcanoes are fascinating geological formations that result from molten rock, called magma, pushing through the Earth’s crust. Eruptions occur when pressure builds up, leading to the expulsion of lava, ash, and gases. Different types of volcanoes exhibit unique eruption styles and characteristics.
Types of Volcanoes
There are several types of volcanoes, each defined by its shape and eruption style. The three primary types include:
- Shield Volcanoes: These are large, broad structures formed by the gentle flow of low-viscosity lava. Their eruptions are typically non-explosive, producing extensive lava flows.
- Stratovolcanoes: These have steep profiles and are characterised by explosive eruptions. They are built up over time from alternating layers of lava and ash.
- Cinder Cone Volcanoes: These are the simplest type, formed from pyroclastic fragments. They have steep slopes and typically erupt once, producing a small amount of lava.
Each type plays a significant role in shaping the landscape and influencing local ecosystems.
The Science Behind Eruptions
Eruptions occur when magma rises to the surface, usually due to increased pressure from gases dissolved within the magma. As magma ascends, it can cause the surrounding rocks to fracture.
When the pressure reaches a critical point, the magma erupts violently or flows out gently, depending on its viscosity. Low-viscosity lava travels further, creating expansive lava flows.
Conversely, high-viscosity magma leads to explosive eruptions, resulting in significant ash clouds and pyroclastic flows. Understanding these processes is crucial for studying volcanic activity and assessing potential hazards.
Materials and Preparation
To create a volcano experiment at home, gathering the right materials is crucial for an effective demonstration. Preparation involves collecting common household items and ensuring safety during the activity.
Gathering Materials
The following materials are needed for a successful volcano experiment:
- Soda Bottle: This will act as the volcano’s main structure.
- Clay or Dough: To shape the volcano around the bottle, creating a realistic appearance.
- Baking Soda: This acts as the volcano’s ‘lava’; it reacts with vinegar to produce fizz.
- White Vinegar: The reactive agent that will cause the eruption when combined with baking soda.
- Food Colouring: This adds visual appeal to the eruption, simulating lava.
- Warm Water: Mixing it with vinegar enhances the reaction.
- Paintbrush: Useful for applying clay or decorating the volcano.
Gathering these materials ensures an engaging and educational experience.
Safety Considerations
Safety is paramount when conducting this experiment. While the materials are generally safe, a few precautions should be taken:
- Supervision: An adult should supervise young children during the experiment.
- Protective Gear: Wearing safety goggles can protect eyes from splashes.
- Mess Management: Conduct the experiment outdoors or ensure a waterproof surface indoors to contain spills.
- Clean Up: Have paper towels or a cloth ready for quick clean-up after the eruption.
By following these safety tips, one can enjoy the experiment without mishaps.
Constructing the Volcano Model
Creating a volcano model involves shaping the structure and adding decorative elements to make it visually appealing. Both steps are essential for a successful science experiment, particularly for a homemade volcano project aimed at kids.
Moulding the Structure
To mould the volcano structure, gather materials such as cardboard, paper mache, or clay. Start by constructing a circular base from cardboard, measuring approximately 30 cm in diameter. This serves as the foundation.
Next, create the cone shape using paper mache. Mix glue, water, and newspaper strips to form a paste. Build up the cone gradually, ensuring it stands around 30-45 cm tall. Alternatively, modelling clay can be used for a sturdier, more refined shape. Allow the structure to dry completely before proceeding.
For added stability, reinforce the base with excess material. This prevents toppling during the experiment. The shape should resemble a classic volcano, with a wide base tapering to a narrower top, allowing for a realistic eruption effect.
Decorating the Volcano
Once the structure is dry, the decorating phase can begin. Use paint or coloured paper to create a vibrant, realistic appearance. Brown and grey shades mimic volcanic rock. Green paper can represent vegetation around the base for a natural look.
Consider adding details such as rocks, shrubs, and even miniature animals to enhance the artistic design. These elements can be glued to the base, making the model more engaging for kids.
For the eruption, a small opening at the top allows for the addition of baking soda and vinegar. This simple combination produces a dramatic effect that captures attention, making the project suitable for science fairs. Encourage creativity; the more unique the design, the more it will stand out.
Executing the Eruption Experiment
Creating a successful volcano experiment involves crafting an effective eruption mix and simulating the eruption itself. Key ingredients and a clear process will ensure the experiment demonstrates chemical reactions effectively.
The Eruption Mix
To create the eruption mix, gather the following ingredients:
- Baking soda (sodium bicarbonate)
- Vinegar (acetic acid)
- Dish soap
- Food colouring (optional, for visual effect)
Begin by combining 2 tablespoons of baking soda with 1 tablespoon of dish soap in a small container that represents the volcano. The dish soap helps to create more bubbles and enhances the visual effect during the eruption.
Next, if a vibrant eruption is desired, add a few drops of food colouring. This step is optional, but it can make the experiment more engaging.
When the mix is ready, set it in a stable location where the lava can flow freely during the eruption.
Simulating the Eruption
To simulate the eruption, pour approximately 1 cup of vinegar directly into the volcano structure containing the eruption mix. The reaction between baking soda and vinegar generates carbon dioxide, producing bubbles and creating an erupting effect.
For enhanced stimulation, he or she may experiment with adding dry ice instead of vinegar. When placed in water, dry ice sublimates to release carbon dioxide gas, mimicking an erupting volcano.
Observe the rapid formation of bubbles when the vinegar interacts with the baking soda. The eruption typically lasts several minutes, giving time to discuss the science behind the chemical reaction.


